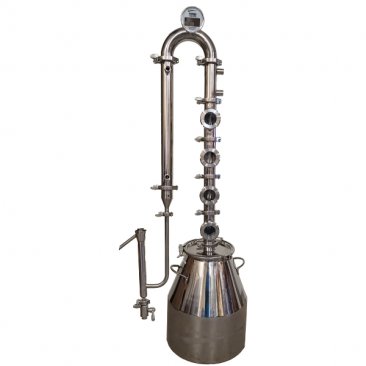
Are you ready to level up your moonshine game? It's time to get serious with our 4x Power Bubble Plate Flute Distiller.
Take control of your spirits. This isn't your grandpa's moonshine still. The 4x Power Copper Bubble Plate Flute Distiller is for the discerning connoisseur who wants to craft exceptional spirits, exactly their way.
Unmatched Versatility: Our modular design lets you adjust the column height for ultimate control over your distillation process. Need a light and lively spirit? Run with fewer sections. Craving a smooth, full-bodied experience? Add sections for maximum refinement. You're the master distiller here.
Effortless Cleaning: We know cleaning equipment can be a chore. That's why our modular design disassembles in a snap. No more wrestling with brushes or cramming your arm into tight spaces. Focus on the fun part – creating exceptional spirits.
Craft Gin Made Simple: The modular gin basket lets you infuse botanicals with ease. Simply add it when you need it, and remove it when you don't. Perfect for creating unique and flavorful gins that will impress your friends.
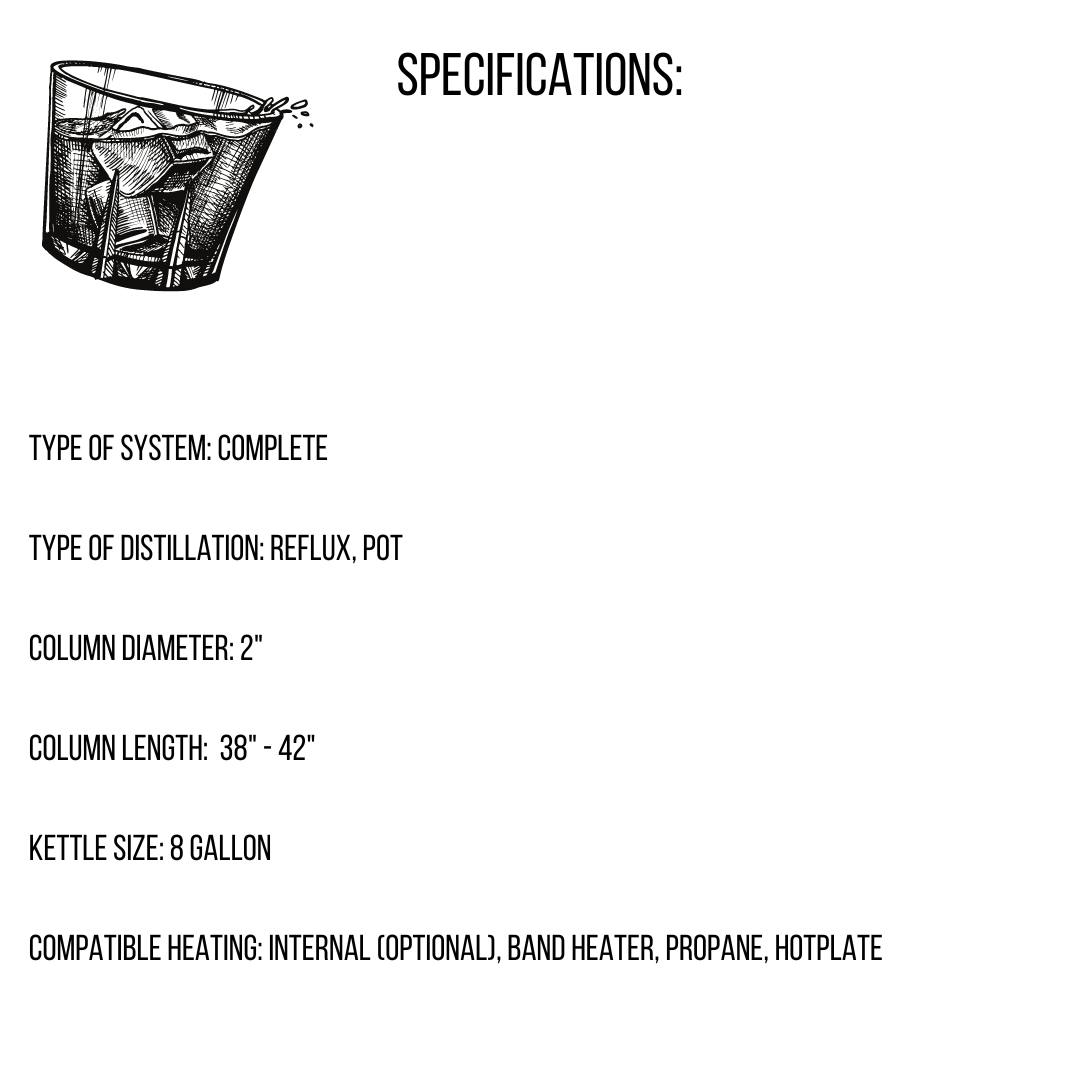
Built to Last: This is serious equipment for serious distillers. Featuring a robust 8-gallon stainless steel kettle, upgraded copper bubble plates, and a massive 2-inch diameter, this column is built for performance and longevity.
Distill Like a Pro:
- Runs in reflux mode or pot distillation mode
- Large viewing windows let you monitor the distillation process.
-
Includes everything you need to get started, from the thermometer to the pump.
This is more than a still, it's an investment. Craft spirits that reflect your unique taste and become the legend behind the bar. Order your 4x Power Copper Bubble Plate Flute Distiller and start distilling your legacy.